AI Agent Component Spec
AI Agent Component Spec
- Package:
@cometchat/chat-uikit-react—npm install @cometchat/chat-uikit-react - Required setup:
CometChatUIKit.init(UIKitSettings)thenCometChatUIKit.login("UID")— must complete before rendering - Init code:
new UIKitSettingsBuilder().setAppId("APP_ID").setRegion("REGION").setAuthKey("AUTH_KEY").build() - Framework: React.js (this page) | Next.js | React Router | Astro
- All components: Components Overview
Prerequisites
Create a CometChat application via the CometChat Dashboard. The dashboard provides user management, group chat, voice/video calling, and real-time notifications. Required credentials from the dashboard:- App ID
- Auth Key
- Region
Getting Started
Install Dependencies
The UI Kit package includes the CometChat JavaScript SDK as a dependency.
- npm
- yarn
Initialize CometChat UI Kit
Call
CometChatUIKit.init() at app startup before rendering any components or calling SDK methods.Auth Key is for development/POC only. In production, generate Auth Tokens server-side via the REST API. See Auth Token.
- TypeScript
- JavaScript
Replace
APP_ID, AUTH_KEY, and REGION with credentials from the CometChat Dashboard.By default, the UI Kit uses local storage. See storage options for alternatives.
User Login
Authentication requires a UID. Create users on the CometChat Dashboard, via the SDK, or API.Pre-generated test users:
cometchat-uid-1 through cometchat-uid-5.The login method returns a CometChat.User object.- TypeScript
- JavaScript
Choose a Chat Experience
Three layout options: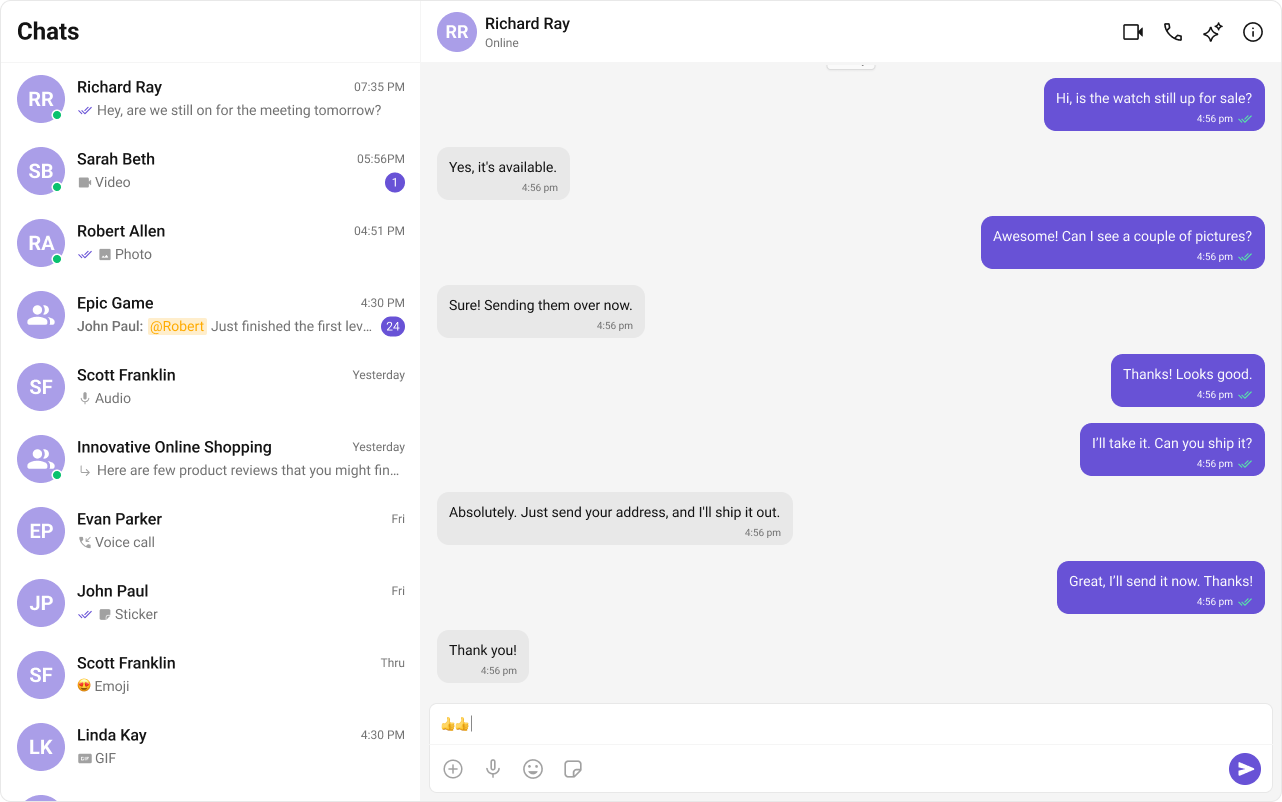
 Integrate Conversation List + Message
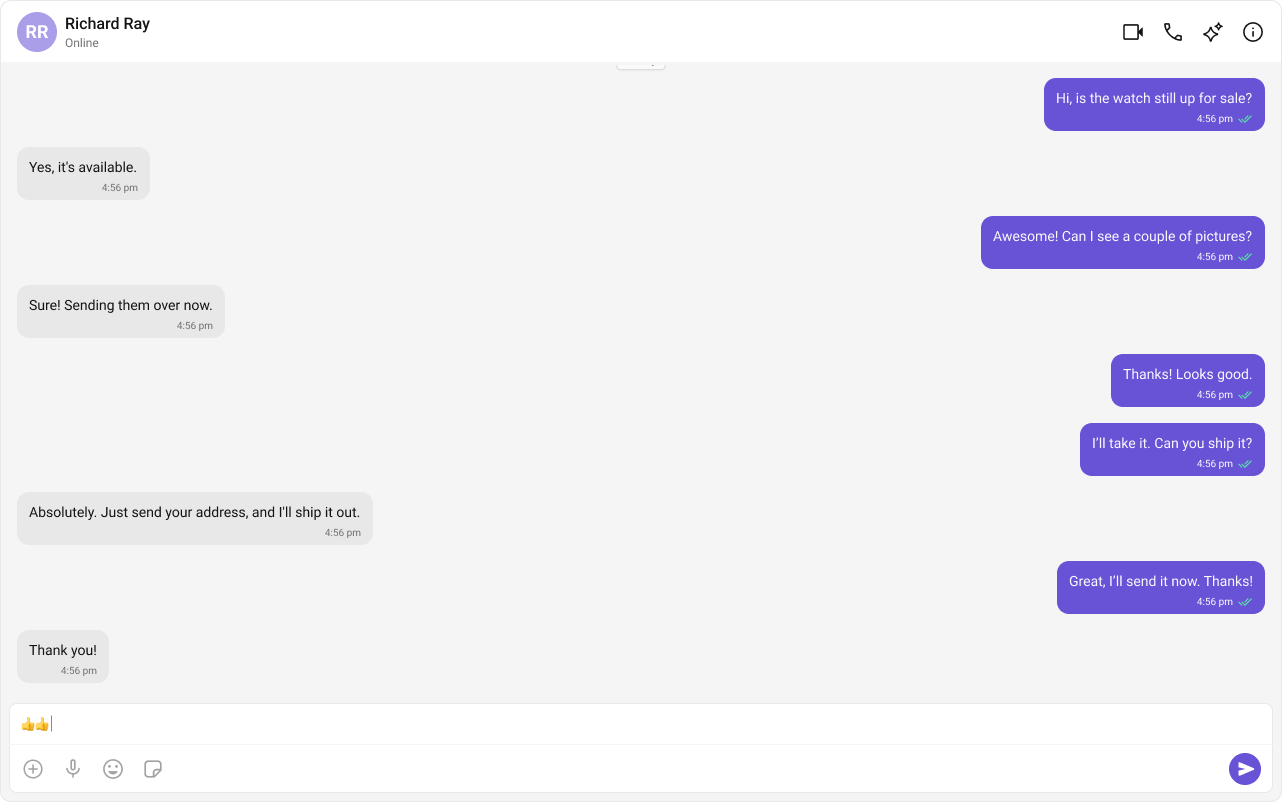

Conversation List + Message View
Two-panel layout: conversation list on the left, active chat on the right. Supports 1:1 and group conversations with real-time updates.One-to-One/Group Chat
Single chat window without a conversation list. Supports both 1:1 and group messaging.Tab-Based Chat Experience
Tab navigation between Chat, Call Logs, Users, and Settings. Works across desktop and mobile.Build Your Own Chat Experience
For full control over the chat interface, use individual components directly:iFrame Support
If you’re embedding your React app inside an<iframe> (or any host that isolates your UI into a separate DOM), wrap your entire tree in the new CometChatFrameProvider. This makes sure all UI-Kit internals (dialogs, portals, etc.) mount into the correct frame.
| Prop | Type | Description |
|---|---|---|
iframeId | string | The DOM id of the target <iframe> element. |
Next Steps
Now that you’ve selected your chat experience, proceed to the integration guide:Conversation List + Message
Two-panel layout with conversation list and message view.
One-to-One Chat
Focused direct messaging experience without a sidebar.
Tab-Based Chat
Multi-tab navigation for chats, calls, users, and settings.
Advanced Customizations
Customize colors, fonts, and styles to match your branding.